Wednesday, October 29, 2008

Apple Pudding

My husband reminded me the other night that I couldn't allow fall to go by without making apple pudding for him. I've been so caught up in searching out new recipes to try, I'd forgotten about one of his favorites.

I'm not sure where the name of this recipe came from because it's been handed down from generation to generation in his family. Even my mother-in-law wasn't sure were the name had originated. It's not a pudding at all....it's baked apples with a cake-like topping. Whatever the name, it's called comfort food filled with lots of memories to my husband.

For the best results, use Granny Smith apples--lots of them! In these pictures, I've used 4 really large apples but that wasn't nearly enough after they had cooked down. I would recommend using at least 8 (yes, really!) large Granny Smith apples. Pile them high in the pan (and over the top of it) because they will cook down.


Apple Pudding

8x8 dish
8 - lg. Granny Smith apples, sliced thin
1/3 – ½ C. sugar
3 tsp. apple pie spice

Preheat oven to 350*

Preparing Apples:
Slice apples thin and pile high in dish. Sprinkle with sugar & spices and set in oven so that the apples can start cooking while you are preparing the cake topping.

I made two errors right off the bat...I chopped up the apples instead of thinly slicing them and I didn't use nearly enough of them to (over)fill the pan. Oh well, we gobbled it up nonetheless.

Cake Topping

Sift together in a bowl:
1 ½ C. flour
2 tsp. baking powder
½ tsp salt

Cream together in another bowl:
1/3c. sugar
¼ C. butter flavored shortening
1 egg, whipped

Alternate flour mix with ¾ c. milk into the creamed sugar mixture. Spoon on top of apples.

Bake for approx. 35 minutes or until light golden brown.

Enjoy!


Cooking with Alicia & Annie Blog Event for October - I won!!

I am such a happy camper today! I was notified that my entry for Amish Funnel Cakes was randomly chosen to win the Taste of Home Cookbook that was offered for entering the Cooking with Alicia & Annie Blog Event. Thank you so much, Amanda! I'm sure I will put this cookbook to good use!

If you haven't checked out this blog event yet, be sure to do so. November's prize is really cool, too! You can enter as many times as you want, so get in there and do what you do best...cook! The rules are simple to follow and there are tons of recipes to choose from.

I'll see ya there in November!

Tuesday, October 28, 2008

TWD ~ Chocolate - Chocolate Cupcakes

Today's Cooking with Dorie recipe is for Chocolate - Chocolate Cupcakes. You can check out the recipe for these chocolatey cupcakes on Clara's blog, IHeartFood4Thought.

Even though the recipe is suggested to be for adults to enjoy more so than children, I made the cupcakes for my son's 11th birthday. I made them more kid-friendly by stuffing the cupcakes with a rich, fluffy buttercream icing and then topping the ganache with colorful candy sprinkles.


When I first made these cupcakes I was extremely disappointed in them--the cake seemed to be missing "something" and I had trouble with the ganache clumping up in the bowl. The only part of these cupcakes that seemed to be any good was the buttercream icing that I used to fill the center of each cupcake.

I was determined to try to make these work!

Here is what I did:

I mixed the batter as instructed. The only difference to my recipe is that I grabbed semi-sweet chocolate instead of bitter-sweet chocolate by mistake, so that is what I used. I altered the cooking time to 17 minutes @ 350*. I tried rushing the process by trying to fill the cupcakes with the buttercream filling before they were completely cool--what a mistake! The cupcakes fell apart. At this point, I was really getting aggrivated so I decided to walk away and give the cupcakes time to cool. This was a good thing! The cupcakes held together much better when they were completely cool.

I filled the cupcakes with this recipe for
buttercream icing:

1 stick of butter, softened
1 TBSP vanilla
1 3/4 C. powdered sugar
1/8 C. whipping cream

Whip butter until fluffy. Mix in vanilla. Alternate mixing in powdered sugar and whipping cream until the icing is fluffy and smooth- this could take several minutes. Use an icing bag to pipe icing into cupcakes.

I made the ganache as directed but I had trouble with it clumping and not staying smooth enough to ice the cupcakes. I added 2 tsp. of milk to the chocolate mixture and then microwaved it for 15 seconds. After stirring it vigorously for about 3o seconds, the consistency was perfect. I spooned the ganache on top of each cupcake, allowing some of it to run down over the sides. Then a splash of colored candy toppings made them look festive.

We were running short on time due to having plans to take my son out for pizza for his birthday, so I left the cupcakes on the rack to dry.

When we returned from our trip, my son was eager to try one of his cupcakes. The time away that allowed the cakes to absorb some of the moisture from the buttercream filling, and combined with the ganache, it turned the cupcakes into a special dessert. Since the cupcake itself is not overly sweet, it made for a great combination with the sweet filling and chocolate topping.

I'm glad that I decided to follow through with this recipe instead of giving up on it.

Saturday, October 25, 2008

Pineapple Dream Cake

For a while now, I've been looking for an easy dessert recipe using pineapple. Something that wasn't heavy, instead light and airy. I found this recipe for Pineapple Dream Cake on FruitCake Recipes.

Their recipe called for yellow cake, I used a white cake mix. Theirs called for Cool Whip but I whipped my own from heavy cream. The end result was very good! Both the cake and icing are light and airy.

This recipe would be great to make a trifle--bake the cake and cube it, and then layer it with vanilla pudding and the whipped cream/pineapple mix. :) Add in some blueberries and/or strawberries for color and you'd have a pretty springtime dessert!

Here is my version:

Pineapple Dream Cake

1 box white cake mix
3 eggs
1 -11 oz can of mandarin oranges, undrained
1/2 C. oil
1 tsp. vanilla

Preheat oven to 350*. Lightly spray a 9 x 13 cake pan with cooking spray.

Stir together all ingredients and pour into greased cake pan.

Bake for 30-35 minutes or until a knife inserted into the center comes out clean --my cake baked for 30 minutes. Cool completely then top with pineapple frosting recipe. (below)


Frosting

12 oz heavy cream
2 TBSP sugar
2 tsp. vanilla
20 oz. can of crushed pineapple, undrained
1 lg. box of instant vanilla pudding.

To whip cream, chill a metal bowl and beaters for a few minutes before using. Pour the heavy cream into the bowl and beat until soft peaks form. Add in sugar and vanilla and continue beating until stiff peaks form.

To the whipped cream, add the crushed pineapple and dry vanilla pudding. Mix together until everything is well blended.

Spread frosting on cake. For the best taste, refrigerate for at least 2 hrs. Keep the leftovers refrigerated.


UPDATE:
This cake was nice and moist the first day but after refrigerating it, it wasn't exactly dry but it wasn't as moist as I like a cake to be. So...I will definitely make this again but the next time I'm going to add one more can of mandarin oranges -that have been drained (reserve juice)-to the cake mix. Then, once the cake has cooled after baking, I'm going to poke some holes in it with a fork and pour the leftover mandarin orange juice over the cake, then frost it. I think that this will help to keep the cake a bit more moist. If you try this, please let me know how it works out.

MMM! Sweet Oranges

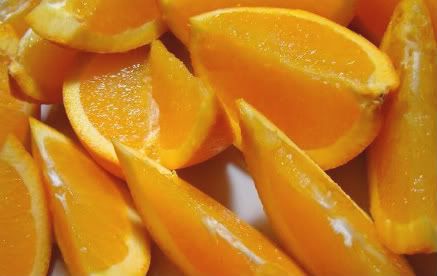
Everyone knows that you shouldn't go shopping when you are hungry but what happens when you are shopping and the food starts calling your name? Such is what happened on the last shopping trip to Sam's Club. I had my list in hand and was sticking to it...until was passed a huge bowl of freshly cut oranges packed in ice. I was trying really hard to stick to my planned budget but we wandered over to try the oranges anyway. From the first bite, my kids wanted me to buy a bag. After two more isles of "would you please buy a big bag of them?!?", I gave in. We now own a huge bag of oranges. I'm not upset about it because it could've been much worse--the kids could've been begging for candy or other junk. Instead, they wanted nature's own sweet treats.


Want a bite? MMM..they sure are juicy!


We have been enjoying them for breakfast and for dessert. With the loads of sweets that we've been eating lately, this is a really nice change.

Wednesday, October 22, 2008

Turkey Sloppy Joe Sandwiches

Things were quite hectic around here last night and the last thing that I wanted was to be was stuck in my kitchen for hours. I whipped up another easy-to-do family favorite--turkey sloppy joe sandwiches. I took the easy way out and served seasoned French fries alongside the sandwiches.

I used this recipe a lot when I was low-carbing by replacing the regular ketchup with Heinz low carb ketchup and the brown sugar with a low carb brown sugar substitute. Either way, it's really good.


Turkey Sloppy Joes

What you need:

olive oil

1/2c. celery, sliced (I omitted)

1/2c. onion, chopped

1/2c. red & green peppers,
chopped (I now use all green to
save $$)

2c. ground turkey, browned

1c. ketchup

3 Tbs. white vinegar

1Tbs. brown sugar, packed

1/2 tsp dry mustard-this is needed
but I did use regular spicy brown
mustard in a pinch and it worked
fine

8 hamburger buns


What you do:

Brown turkey in olive oil and drain well if there is any leftover grease in the pan.

Saute celery, onions & peppers, cook until tender.

Add cooked turkey, ketchup, vinegar, br. sugar & mustard. Reduce heat to low and simmer 15 minutes--doesnt really need to simmer that long if you don't have the time.

Spoon into buns. Enjoy!

Monday, October 20, 2008

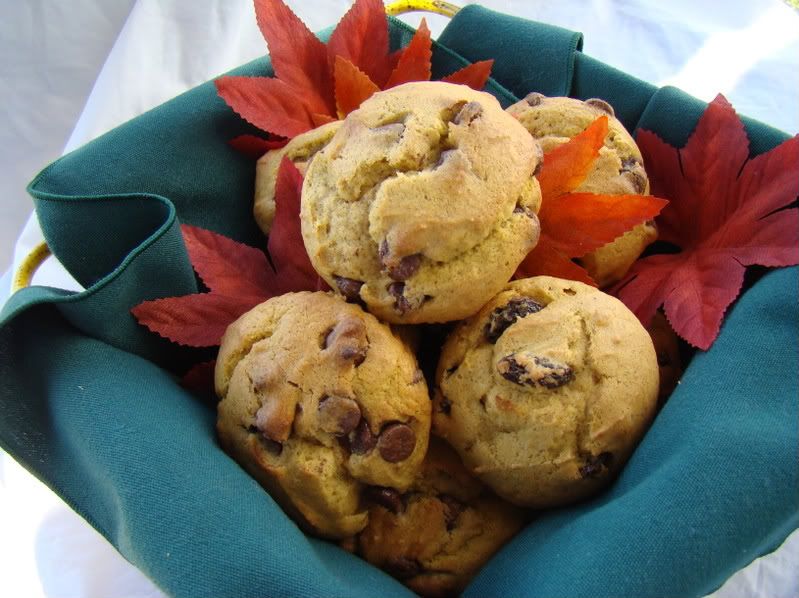
Tuesdays with Dorie - Pumpkin Muffins

I was so excited to participate in my first Tuesdays with Dorie recipe. I was even more excited when I realized that we would be making pumpkin muffins. Thanks, Kelly of Sounding My Barbaric Gulp, for choosing a great recipe!

My family loves just about any type of pumpkin baked goods and this recipe didn't disappoint!

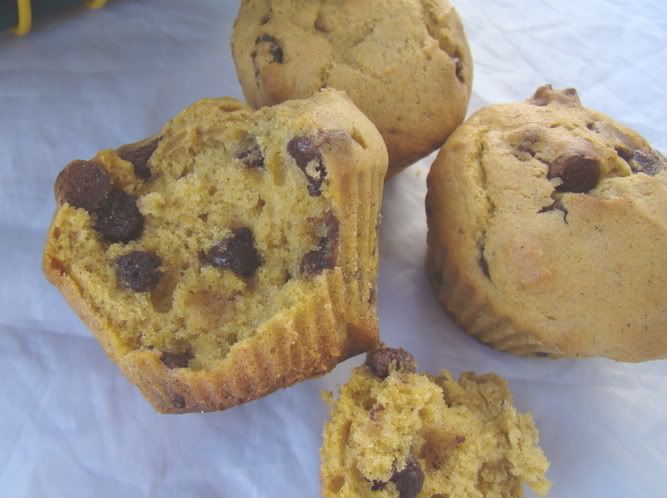
I added mini chocolate chips to half of the batch and to the other half, I added raisins. The pumpkin/chocolate chips satisfied my cravings for my new favorite flavor combination and the pumpkin/raisin combo made my husband a happy camper.


Like many other have commented, I had to adjust the baking time. Using silicone baking cups, I baked these muffins at 400* for 17 minutes. They turned out very moist; but, they are a more dense muffin, not light and airy. I had a few left over so I decided to freeze them. They weren't nearly as good warmed up again as they were the first day straight out of the oven. I would recommend only making what you are going to eat that same day.

Trick or Treat Toffee Grahams

Do you have to make something for an upcoming fall festival or bake sale? My recipe for toffee grahams is super easy and looks great packaged in bags with pretty bows!


Click on the title of the recipe to see full instructions on how to make them.

Sunday, October 19, 2008

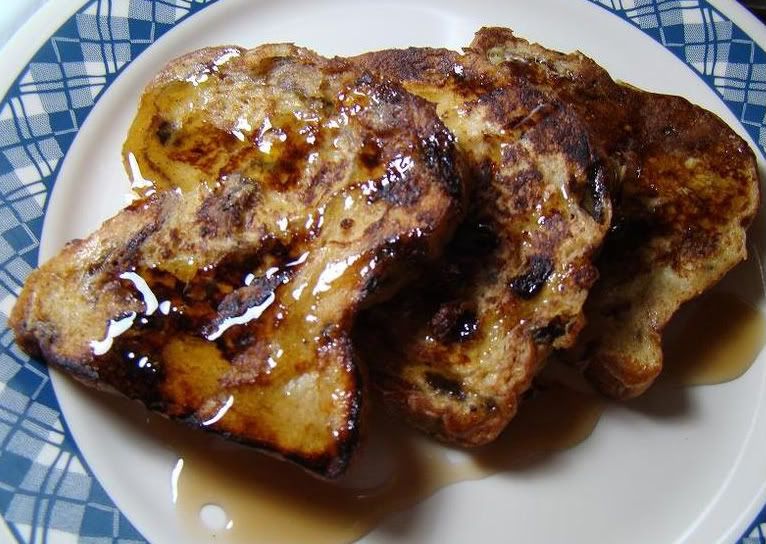
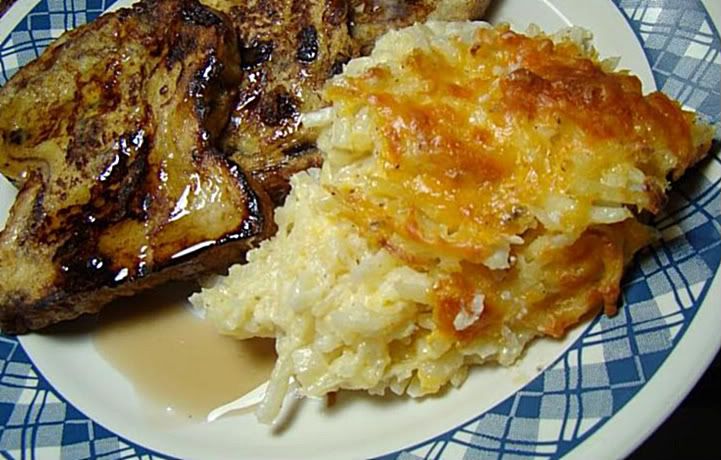
Breakfast for Dinner - Cinnamon Raisin French Toast & Hash Brown Casserole

Today was one of those days when I could've stayed under the covers all day and slept the day away.

**Snap back to reality**

I had a lot to do today, including going grocery shopping.

I took the easy way out for dinner tonight and made our favorite so-called breakfast meal consisting of cinnamon raison French toast and my version of Cracker Barrel's hashbrown casserole.

We are lucky to have an Entenmann's Bakery Outlet nearby. I can picked up Sun Maid raisin bread there for a much better price than in a regular grocery store.

Usually everyone has their own favorite French toast recipe and here is mine:


Cinnamon Raisin French Toast

1 loaf of raisin bread
6 eggs
1/2 C. milk
1 TBSP. vanilla
2 tsp. sugar
2 tsp. cinnamon

Break eggs into a bowl and beat wisk lightly. Wisk in sugar, cinnamon, vanilla and milk. In a frying pan, over medium-low heat, melt 2 tsp. of butter. Place the bread slices, one at a time, into the bowl, letting the slices soak up the egg mixture. Turn the bread over to coat the other side. Transfer bread slices to skillet. Cook until the bottoms are golden brown. Flip and cook the same on the other side. Serve hot with butter and syrup.

The hash brown casserole recipe came about by lots of experimenting. I've finally perfected to the way we like it.


Hash brown Casserole
1 can of cream of chicken soup
8 oz. of sour cream
2C. + 1/2 C. Cheddar cheese, grated
1/2C. melted butter
1 small onion, minced
1 tsp. salt
1/2 tsp. black pepper
2lb. bag frozen shredded hashbrowns--THAWED--Important!!

Spray a 13 x 9 dish with non-stick spray.
In a bowl, combine all ingredients except potatoes + 1/2 C. cheese to sprinkle on top.

Gently fold in potatoes into mixture and pour into prepared pan. Sprinkle with leftover cheese.

Bake at 350* for 5o - 60 minutes. If you want a crispier top, stick it under the broiler at the end of baking.

This will freeze well.

Thaw first to speed baking. If you baked it frozen, increase baking time.

Mostacolli & Sauce

My husband said that I couldn't have made him a better dinner to celebrate our 12th anniversary. :)

One of my many versions of Mostacolli and Red Sauce with Sausage


2 lbs of Mostacolli, cooked al dente


3 big cans of tomato sauce
1/2 lb of bulk hot sausage
1 lg. pepper, dice into small pieces
1 medium onion, diced into small pieces
1 pint of baby bella mushrooms, chopped
3 tsp. of minced garlic
2 tsp of red pepper flakes
2 TBSP Italian seaosonings
olive oil

In a large frying pan, saute diced pepper, onions and mushrooms in olive oil. Set aside.

To the same pan, add hot sausage and cook until no longer pink. Add garlic and heat through for 1 minute.

Add the pepper, onions and mushrooms back into the pan. Pour in tomato sauce. Add garlic, red pepper flakes and Italian seasoning. Cook over medium heat for 15 minutes, and then reduce heat to low and continue cooking for 2 hrs. If the sauce becomes too thick for your liking, add a bit of water or chicken stock to it.

Ladle sauce onto warm pasta and top with shredded Mozzarella cheese.


Friday, October 17, 2008

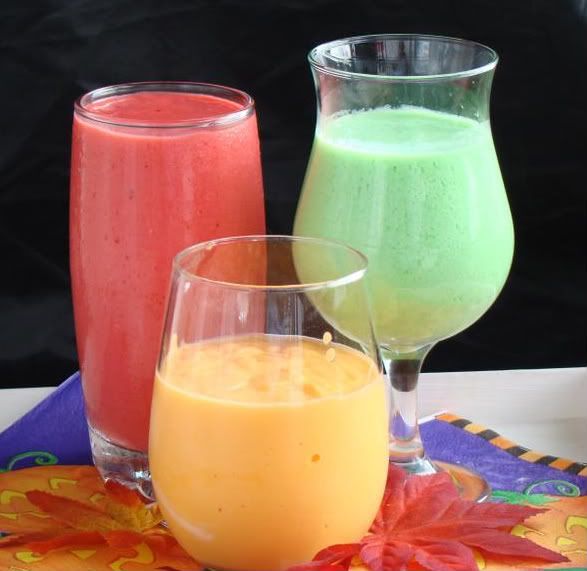
Halloween Smoothies

These crazy colored smoothies are a great alternative to candy when the kids want something sweet to drink. Great fruit smoothies ....and you control the sugar!

Simply click on the name of the drinks to see the recipe in its entiretly. YUM!

Graveyard Peanut Butter Pie


Dig into this pie and you might feel as though a spell has been cast upon you because you can't resist going back for seconds!
Simply click on the title of this recipe to see it in its entirety.


This recipe just seemed to fall together as I was making it. It is so good! If you're a peanut butter lover, give this pie a try!  Click on the title of the post to see the recipe.

I prefer to eat it when its partially thawed. My husband, on the other hand, likes it when it has completely thawed out.

Either way, its rich & creamy and really good!

Thursday, October 16, 2008

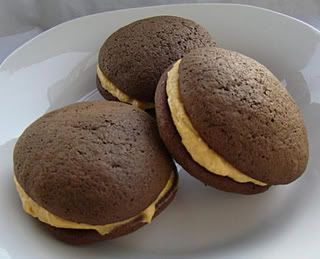
Cookie Carnival's Mini Pumpkin Whoopie Pies

This is my first time participating in the Cookie Carnival! This month's recipe is Mini Pumpkin Whoopie Pies.

I've never really been a whoopie pie fan but the thought of chocolate and pumpkin together in this combo intrigued me. I decided to give it a shot. They turned out to be really good. The pumpkin filling and chocolate cake cookie go nicely together. Make sure not to over bake the cookies. Watch them carefully after 8 minutes...mine were done then. To get a nice, creamy filling, I had to beat the filling for a long time. I would double the pumpkin cheesecake filling the next time.


My cookies turned out a little bigger than "mini" but that just means that there's more to enjoy, right?


Mini Pumpkin Whoopie Pies
from Martha Stewart

Makes about 20.


INGREDIENTS FOR THE COOKIES:

* 1 3/4 cups all-purpose flour
* 3/4 cup unsweetened cocoa powder (not Dutch-process)
* 1 1/2 teaspoons baking soda
* 1/2 teaspoon coarse salt
* 1 tablespoon unsalted butter, softened
* 1/4 cup vegetable shortening
* 1/2 cup granulated sugar
* 1/2 cup packed dark-brown sugar
* 1 large egg
* 1 cup whole milk
* 1 teaspoon pure vanilla extract


INGREDIENTS FOR THE FILLING:

* 4 ounces cream cheese, at room temperature
* 1/2 cup (1 stick) unsalted butter, at room temperature
* 1/2 cup confectioners' sugar
* 1/4 cup canned solid pack pumpkin
* Pinch of cinnamon
* Pinch of nutmeg


DIRECTIONS:

1. Prepare cookies: Preheat oven to 375 degrees. Sift together flour, cocoa powder, baking soda, and salt into a medium bowl; set aside.

2. Place butter, shortening, and sugars into the bowl of an electric mixer fitted with the paddle attachment. Mix on high speed until smooth, about 3 minutes. Add egg; mix until pale and fluffy, about 2 minutes. Mix in half the flour mixture, then the milk and vanilla. Mix in remaining flour mixture.

3. Drop about 2 teaspoons dough onto baking sheets lined with parchment paper, spacing 2 inches apart. Bake until cookies spring back when lightly touched, 12 to 14 minutes. Transfer baking sheets to wire racks and let cool 10 minutes. Remove cookies from baking sheets and transfer to wire racks using a spatula; let cool completely.

4. Prepare filling: In the bowl of a mixer fitted with the paddle attachment, whip together cream cheese, butter and confectioners' sugar on medium speed until smooth, about 3 minutes. Add pumpkin, cinnamon, and nutmeg; whip until smooth, scraping down the bowl as necessary.

5. Pipe or spoon about 2 teaspoons filling on the flat sides of half the cookies. Sandwich with remaining cookies, keeping the flat sides down.


Tuesday, October 14, 2008

Mother Nature's Fall Decorations

Mother Nature has just begun to share her beautiful fall decorations with us here in this part of NC. The beautiful colors are starting to peek out in several places.

Unfortunately, to go along with the beautiful scenery, the seasonal flu bugs have hit our home. My son has been home from school with Bronchitis since the end of last week. My plans for starting "Tuesdays with Dorie" will be put on hold until next week because I am enjoying some rare moments of hugging my "baby" during this time. You know how 11 yr. olds are...most of the time they don't want anything to do with Mom hugging them; but when they are really sick, they don't seem to mind it. ;) Hopefully he will be able to return to school tomorrow. We were aiming for today but that didn't happen.

These pictures were taken down by the river about 2 1/2 miles from our home. I took them yesterday while waiting for the pharmacy to fill my son's prescriptions. The news reports that prime viewing time for the rich, bright colors will be in about two weeks. I sure hope so!

In the meantime, here's what it looks like here:


Sunday, October 12, 2008

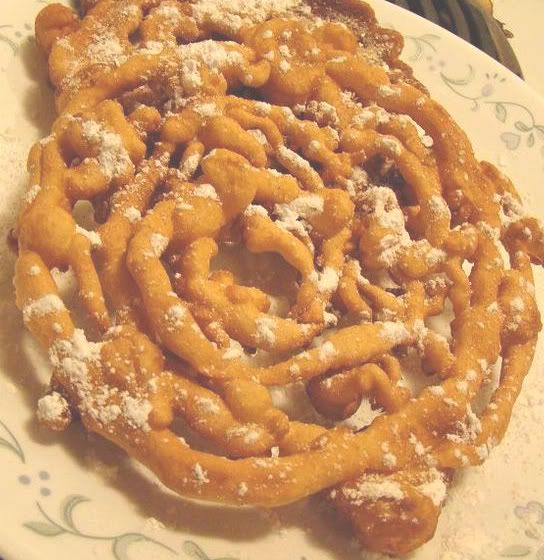
Cooking with Alicia & Annie Contest - Amish Funnel Cakes

We love to go to the fall festivals in the little towns around us. What I don't like is the price that they charge for a funnel cake! $5.00!! This recipe for Amish Funnel Cakes can be found at Annie's recipes. This batter makes the best funnel cakes that I've had in years, no kidding! The best part is that it doesn't cost me $5.00 to make this entire recipe! :)

I mixed the batter using the exact ingredients listed. This makes a lot of funnel cakes--probably at least 12 large. I made 8 and some batter left over. I'm refrigerating it and will try to use it again tomorrow night. (not sure if that will work?) I thinned the batter out a bit more with 2 tablespoons of water because I was using a measuring cup to pour the batter and not a funnel.

It doesn't say what kind of oil or how much of it to use. I used about a 1/2 in. of vegetable oil in a large frying pan.

Here is the recipe with the changes I've made:

Amish Funnel Cakes

3 eggs, beaten
2 c. milk
1/4 c. sugar
4 c. flour
2 tsp. baking powder
1/2 tsp. salt


Instructions

To beaten eggs, add milk and sugar.

In separate bowl sift dry ingredients. Add dry ingredients to egg mixture, beating until smooth.

Heat oil to 375 degrees and pour batter into hot fat through a regular household funnel. Control the flow of batter by holding your finger over the bottom of the funnel. Make patterns, designs, swirls or whatever with the stream of batter as it flows into the hot fat.

When "cakes" are golden brown, drain on paper towels, and then sprinkle with confectioners' sugar and/or cinnamon sugar. Serve warm.

Cooking with Alicia & Annie Contest - Amish Oven Fried Chicken

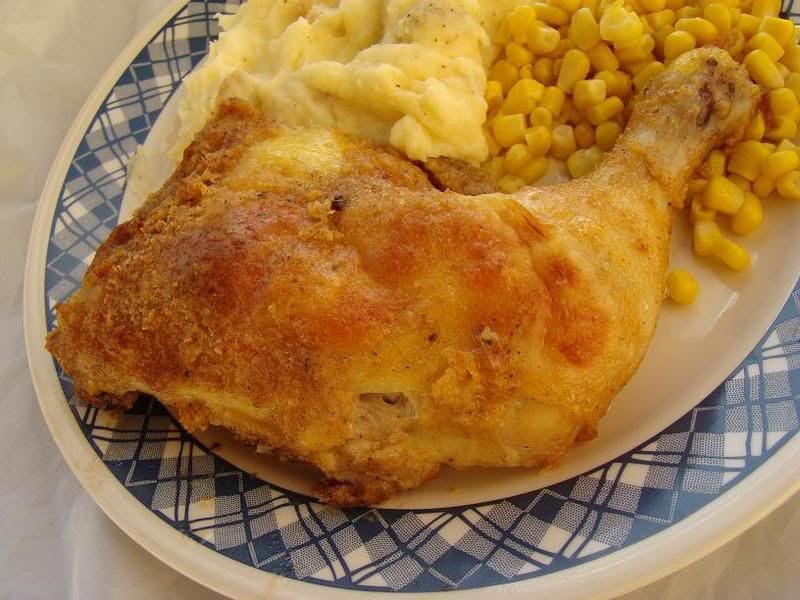
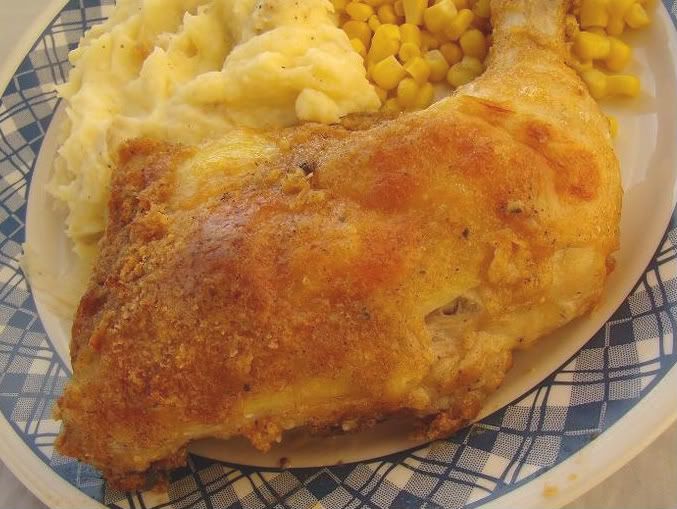
It's not often that we eat fried chicken at home. My kids have been asking me to make them fried chicken for a while now. I added it to the menu for this week and then had to set out to find an easy recipe for it. While looking over the recipes on Annie's Recipes for the "Cooking with Alicia & Annie Contest", I came across a recipe called "Amish Oven Fried Chicken". I figured that it would be worth a try since the oven would "fry" it and I wouldn't have to stand over a pan for a long time.

The recipe is easy to follow, though I did make some simple changes- I used a Ziploc baggie to hold the flour mix instead of a paper bag. I baked the chicken for 15 minutes at the end instead of 5 or 10, as directed.
I substituted poultry seasoning for the marjoram and added 2 TBSP. of spicy creole seasoning to the flour.
A good tip* -remove the chicken from the pan to a plate lined with paper towels to help remove some of the oils. The next time I make this I will reduce the butter and oil to 1/4 C. each.

Here is the recipe with my changes:

Amish Oven Fried Chicken

1/3 c. vegetable oil - use 1/4 C. next time
1/3 c. butter - use 1/4 C. next time
1 c. all-purpose flour
1 tsp. salt
2 tsp. black pepper
2 tsp. paprika
3 tsp. garlic salt
2 tsp. poultry seasoning
8 or 9 pieces chicken -- I used 5 whole leg/thigh pieces

Instructions

Place oil and butter in a shallow cooking pan and place in 375 degree oven to melt butter, set aside.

In a large Ziploc baggie, add dry ingredients. Roll the chicken pieces- 1 at a time- in butter and oil then drop into a bag and shake to cover. Place on a plate until all pieces are coated. Leave any excess butter and oil in pan.

Place chicken in the pan skin side down or its just as good if you remove all the skin first.

Bake at 375 degrees for 45 minutes with spatula, turn chicken pieces over and bake 15 minutes longer or until crust begins to bubble. Remove chicken from pan to a plate lined with paper towels.

Saturday, October 11, 2008

Cooking with Annie & Alicia Contest - Halloween Cupcakes


Since Halloween is in the air, I decided to make some Halloween Cupcakes for the Cooking with Annie & Alicia contest.

I have to admit that when I mixed up the batter for the cupcakes, I had little hope that they were going to turn out like cupcakes--but I was wrong! They did indeed turn out to be very good. The finished cupcake is more like a cheesecake cupcake than an ordinary cupcake. It's not overly sweet, which is nice. There's no need to use any type of frosting on them. I used silicone baking cups and had no problems with the batter sticking to the cups.

You could easily change the color of the cheesecake and the cholate chips to represent any holiday...red coloring and cherry chips or peppermint candies for Christmas, green coloring and Andes Candies chips for St. Patricks Day, or even pink and purple coloring for Easter. ;)


Here is my version of this recipe with the few changes that I made:

Halloween Cup Cakes

Ingredients for Filling:
1 (8 ounce) package cream cheese, room temp.
1 egg
1/3 cup sugar
1/8 teaspoon salt
1 (6 ounce) package chocolate chips
orange paste food coloring

Ingredients for Cupcake Batter:
1 1/2 cups flour
1 cup sugar
1/4 cup cocoa
1 teaspoon baking soda
1/2 teaspoon salt
1 cup water
1/3 cup oil
1 teaspoon vanilla

Instructions:Preheat oven to 350 degrees.

Filling:
Beat together cream cheese, egg, sugar, and salt. Add chocolate chips.
Add paste fooding coloring to make the filling light orange. Blend well
and set aside.

Batter:
In a large bowl, sift together flour, sugar, cocoa, baking soda, and salt.
Stir in water, oil, and vanilla.

Fill 15 cupcake liners 1/2 full with chocolate batter.

Drop 1 heaping teaspoon of cream cheese mix on top.

Bake 30 minutes. Remove to cooling racks to cool completely.

Fruit Salsas with Cinnamon Tortilla Dippers


Give a new meaning to "chips and salsa".

These fresh, fruity salsas are a healthy alternative to candies and other sweets. Kids of all ages will enjoy this treat

This was another way for me to get my kids to eat more fruit. :) Of course, it helps to have the cinnamon tortilla dippers to go along with the salsas. lol!

To Make Strawberry Apple Salsa:

1 c. of fresh strawberries
2 medium apples
1/2 c. mandarin oranges, drained well
1/4 c. fresh pineapple or unsweetened canned pineapple
1-2 tbsp Splenda - to taste
2 tbsp sugar free strawberry jam

Peel apples and pineapple. Chop all fruit into small pieces and put into a food processor. Sprinkle Splenda over the fruit. Process the fruit using the pulse button on the food processor until the mixture resembles chunky salsa. Pour the salsa into a small bowl and stir in the jam until all of the fruit has been coated. Cover and chill at least 15 minutes before serving.

To Make Melon Berry Salsa:

1 c. cantaloupe
1 c. frozen berry mix consisting of strawberries, blueberries, blackberries and raspberries, thawed and very well drained
1/4 c. sugar or Splenda
2 tbsp lime juice
Chopped fresh mint (optional)

Peel cantaloupe and cube into very small bite-sized pieces. Add to a small bowl. Add berries to a food processor. Using the pulse button on the food processor, chop the berries until it resembles chunky salsa. Stir berries into the cantaloupe pieces. Stir in sugar and lime juice. Sprinkle in mint, if using, and stir well to mix. Cover and chill at least 30 minutes before serving.

To Make Cinnamon Dippers:

4 large 10" tortillas
1 tbsp Splenda or sugar
2 tsp cinnamon
butter-flavored cooking spray

Preheat oven to 400 degrees F.

Stack tortillas into one pile. Cut the tortillas vertically into longs strips. Lay the strips in a single layer on a large baking sheet. Don't crowd the strips; instead do 2 batches if necessary. Lightly spray the tortilla strips with the cooking spray. Mix sugar and cinnamon together and sprinkle over the tortilla strips. Bake for 7-8 minutes or until the tortillas are lightly browned and crispy.


Linking up to:

Gooseberry Patch: Fall's Favorite Fruit!

Halloween Peanut Butter Balls

If you love peanut butter like I do, you have to try my recipe for these peanut butter balls! The peanut butter filling is smooth and creamy. What could make that better? Covering it in chocolate, of course! MMM!! Just click on the title of the recipe for complete details.

Candy Corn Quesadillas

These cheesy quesadillas are an easy-to-make after school snack that your kids can whip by themselves or with very little help from an adult. Best of all....it only looks like candy! It's a healthy snack that you won't mind them eating.


This is my latest Halloween recipe for MomsMenu.com My kids love these "candy corns" as a snack after school. Just click on the title of the recipe for complete instructions. :)

Thursday, October 9, 2008

Chicken Noodle Soup

When it's dreary out and everyone is feeling blah, soup is a sure hit for dinner. I love this soup because it's quick and easy to make, making dinner one less hassle for the day.


12 C. chicken broth

3 lg. boneless chicken breasts

5 whole carrots, diced into small pieces

3 celery stalks, diced into small pieces

1 lb pasta shells


Cook pasta and set aside.

In a large pot, add chicken broth and boneless chicken breasts. Bring to a boil over high heat. Reduce heat to medium and cook for 30 minutes. Add carrots and celery and cook until vegetables are tender. Remove chicken from soup and shred using 2 forks. Return chicken to soup.

Fill bowls halfway with pasta and ladle the soup overtop.

Tuesday, October 7, 2008

Pretzel Breaded Fish

I tried a new twist on my usual fish recipe for tonight's dinner...I made pretzel breaded fish from "What's for Supper?".

I didn't mention the changes to my family because I wanted to see their reactions to it before telling them that the coating was made from pretzels. Everyone ate it without any complaints. My husband did end up telling me that he liked it but that he liked my other fish recipes better. I would say that it's a nice change when the menu gets boring.


INGREDIENTS:

Pretzels
Flour
black pepper
Creole seasoning
1 Egg
1/4 Cup milk
oil
Fish


How I made it:

I basically made it per the original directions but I added Creole seasoning to the flour.

Crush pretzels in a plastic bag with a mallet or food processor.

Dip the fish in some seasoned flour (I used some black pepper and Creole spices).

Then dip the fish in an egg/milk mixture (1 egg and 1/4 cup milk whisked together).

Then press the fish in the crushed pretzel mixture until well coated.

Pan fry the fish in a small amount of oil, approximately 2-3 minutes on each side or until golden brown and cooked.

I made a mustard-mayo sauce to go with it.


Mustard-Mayo Sauce

1/8 C. mayo
1/4 C. grainy brown mustard
5-6 shakes of Tabasco sauce

Stir until well blended.

Rustic Apple Dumplings with Cinnamon Sauce

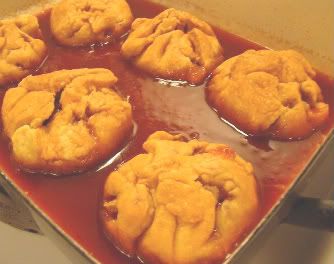
I'll admit it...I'm afraid to attempt making a pie crust from scratch. I'm not sure why I freeze up when my husband asks me to make him an apple pie. For now, this is as close to an apple pie that I think he is going to get from me.

I must say that I am thrilled with the word "rustic" because it takes my "not-so-perfect-looking" apple dumplings and makes them look like they are supposed to be bumpy and pieced together. lol! Although they may not look perfect, they taste so very good! (and that's the important thing, right?)


Rustic Apple Dumplings with Cinnamon Sauce

Ingredients:

Dough
2 C. flour
2/3 C. butter-flavored shortening
1 tsp salt
5 TBSP ice water

Apple Filling
2 C. Granny Smith apples, peeled and chopped into small pieces1 TBSP apple pie spice

Cinnamon Sauce
2 C. brown sugar, packed firm
1 C. water
1/4 C. butter, cubed small
1/4 C. Red Hot candies

To Assemble:

Combine flour and salt. Cut in shortening until crumbly. Slowy add water, mixing with a fork until the dough forms into a ball.

Lightly flour your work surface. Roll the dough into a 12 x 18 rectangle. Cut dough into 6 squares.

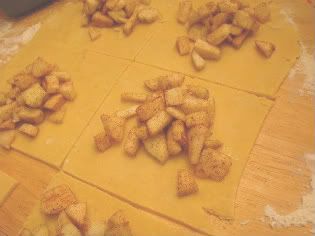
Toss together the cubed apples and apple pie spices. Scoop 1/3 cup of apples into the center of each square.


Working with the opposite corners of each square of dough (top left and bottom right-top right and bottom left), fold the dough corners over the apples and pinch together on the top of the apples. Pinch the dough together around the apples forming a dumpling shape.

Grease a 9 x 13 baking dish. Place dumplings into the dish. Bake at 350* for 25 minutes.

While the dumplings are baking, prepare the sauce. In a medium, non-stick saucepan combine the brown sugar, water, butter and Red Hot candies. Bring to a boil and simmer for 5 minutes--Stir constantly!

Remove dumplings from the oven. Pour the sauce over the dumplings and bake for another 25 minutes or until the dumplings are golden brown and the apples are soft. Serve warm.


Monday, October 6, 2008

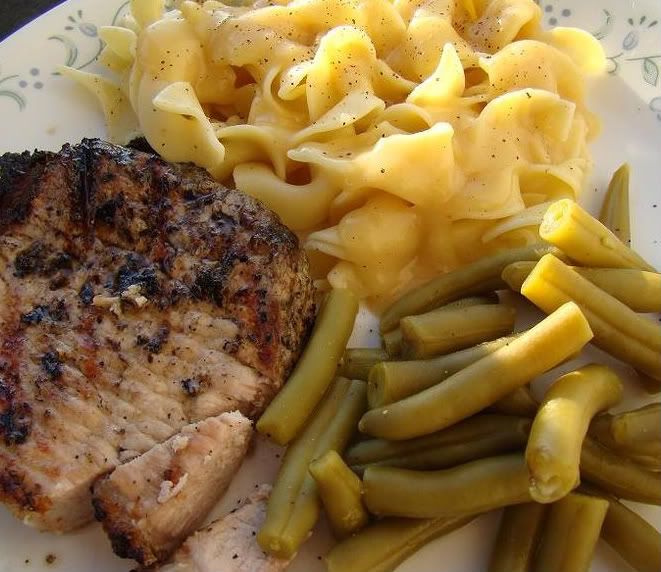
Grilled Lemon Pepper Pork Loin

I strive for quick & easy dinners every night of the week. Now, we all know that that's almost impossible all of the time. This dinner, though, is one of those that is quick and easy to make and tastes great, too. (You do have to remember to marinate the meat early in the day.)

Lemon Pepper Pork Loin
1-2 to 3 lb. pork loin
1/4 C. olive oil
2 TBSP white vinegar
3 TBSP lemon pepper seasoning (no salt added)
1/4 C. Italian dressing

Slice the pork loin into 3/8 in. slices. Mix the remaining ingredients in a Ziploc baggie. Add meat; shake to coat the meat with the marinade.
Place the bag into the refrigerator for at least 30
minutes.

Remove from refrigerator. Grill pork over medium heat until a tiny bit of pink remains in the center of meat. Remove to a plate and cover with foil. Serve immediately.

Sides:
1 bag of extra wide egg noodles
easy chicken gravy*
canned green beans

It's very easy to make homemade gravy:

Make a roux of 1 TBSP butter to 1 TBSP flour for each cup of gravy.

I made 4 cups.

Melt 4 TBSP butter in a pan over medium heat. Wisk in 4 TBSP flour, stirring constantly. Allow to cook for about 2 minutes or until bubbly.

Pour in 4 cups of chicken broth and continue stirring until the mixture has thickened.

I didn't add any seasonings to this gravy since the pork was seasoned and I didn't want to mix the flavors.

Chocolate Chocolate Chip Cookies

Comfort food...that's what my son was in need of tonight. He's been trying to fight off a cold for the last week but it finally got the better of him tonight. His request tonight after dinner..."Mom, can you make something "normal" for dessert tonight, PLEASE? How could anyone resist this request?

My daughter was the first one to chime in with "make chocolate chip cookies!". Since he was happy with her choice, I dug out a favorite cookie cookbook of mine, The Cookie Bible, and found a recipe called "Design Your Own Chocolate Cookies". It's a recipe for your basic chocolate cookie dough and then you choose whichever extras that you would like to add into it. In this case, I added semi-sweet chocolate chips.

The cookies turned out great--they're slightly crispy on the outside, yet chewy in the middle. The chocolate chips stayed semi-soft, too, making them even more delectable! MMMM!!!


Chocolate Chocolate Chip Cookies

1 C. butter, softened --I used 1/2 C. butter
& 1/2 C. of butter-flavored Crisco
1 C. sugar
3/4 C. packed light brown sugar
2 tsp. vanilla
1/2 tsp. salt
2 eggs
2 C. all-purpose flour
1/2 C. Hershey's cocoa
1 tsp. baking soda
12 oz. of choc. chips

Instructions


Heat oven to 375*


Beat butter, sugar, brown sugar, vanilla and salt in a lg. bowl until creamy. Add eggs; beat well.


Stir together flour, cocoa and baking soda; gradually add to butter mixture, beating until well blended. Stir in chocolate chips.

Drop by rounded teaspoons onto ungreased cookie sheet.


Bake 8-10 minutes or until set. (it took my cookies about 8 1/2 minutes)

Cool slightly; remove from cookies sheet to wire rack. Cool completely---can you really resist eating these cookies while they are warm?!?


We loved these cookies so much that I've decided to submit them for a BookMarked Recipe. My family has been begging me to make them more of these! This is a definite keeper!

Related Posts Plugin for WordPress, Blogger...